How to setup Dotdigital
Connect Dotdigital so each Giftnote gift event triggers a Dotdigital email campaign: create an API user, map events to campaign IDs, test, then turn it on.
Written By Giftnote Admin
Last updated About 21 hours ago
Connect Dotdigital and Giftnote sends each gift moment (a gift ordered, delivered or received, a gift card sent) to a Dotdigital triggered email campaign, so your gift emails go out from Dotdigital in your own designs.
Before you start
You need an API user in Dotdigital: a separate login that apps like Giftnote use to connect. The first section below shows you how to create one.
Create an API user in Dotdigital
- Open your Dotdigital dashboard.
- Go to Settings → Access → API Users.
- Click ADD NEW API USER.
- Complete the form.
- Enter "Giftnote" for the description, or similar.
- Enter a password. Giftnote uses it to connect to Dotdigital, so note it down.
- Select "Tiered" rate limiting.
- Set the status to "Enabled".
- Click Save.
Connect Dotdigital to Giftnote
- Open the Giftnote app inside your Shopify admin.
- Go to Settings → Integrations. Find Dotdigital under Available · Marketing and select Connect. If it is already connected, it's under Connected: select Manage settings.
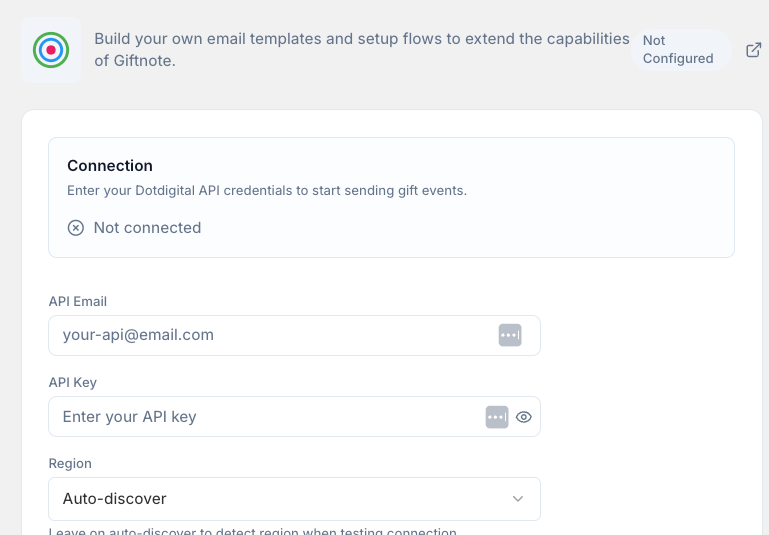
- Enter your API user's email and password (key).
- Choose your Dotdigital region.
- Save if a save bar appears.
Configure campaign IDs and testing
Each Giftnote event you want to use needs a Dotdigital "Triggered Email" campaign. Giftnote sends the event to the campaign whose ID you enter against it.
- Find the campaign ID fields. In the Dotdigital settings in Giftnote, each Giftnote event has a field for its campaign ID.
- Create or edit a Triggered Email campaign in Dotdigital.
- Add personalization values. Paste these into the campaign where you want the gift details to appear. Which ones fill in depends on the event:
@TO@@FROM@@MESSAGE@@DELIVERYMETHOD@@SCHEDULEDTIME@@GIFTCARDCODE@@GIFTCARDVALUE@@GIFTCARDEXPIRY@@GIFTCARDSKU@@GIFTCARDBALANCE@@ORDERSKUS@@ACTIVITYID@@RETURNURL@
- Copy the campaign ID. You'll find it in the page URL while you edit the campaign.
- Enter the ID under the matching event in Giftnote and save.
@RETURNURL@ only fills in when the Loop Returns integration is on. See Loop returns Integration.
Test the integration
- In Dotdigital, go to Settings → Access → API Logs.
- Turn on API Logging, and wait about 5 minutes.
- Send test events from Giftnote. Use the test option on the Dotdigital settings page to send mock events to Dotdigital.
- Check the API Logs. You should see the test events from Giftnote.
Turn on the integration
- Go back to the Dotdigital settings page in Giftnote.
- Turn on the integration. Save if a save bar appears. Giftnote now sends events to Dotdigital.
- Turn off the matching Giftnote emails. In Settings → Notifications, switch off Giftnote's own email for each gift moment Dotdigital now handles, so recipients don't get two emails.
If any of these steps don't match what you see in the Giftnote app, chat with us using the chat button in the help centre or in the app, or email support@giftnote.com.
Related articles
Still need help? Share an idea